
Fire Vellumental Cave is the sixth Yellow Streamer level in our Paper Mario: The Origami King Walkthrough. Our complete guide also includes collectibles.
Just looking for collectibles? Check out our Fire Vellumental Cave collectibles page for simple lists and locations for every collectible:
| Fire Vellumental Cave Collectibles Guide | |||
| Toads | Holes | Treasures | Blocks |
You made it to the third Vellumental dungeon! All thanks to the ritual you performed in the Scorching Sandpaper Desert. Once inside, walk down the path and into the next room. That is, after you leave Professor Toad at the entrance. Careful not to fall into the lava, it takes a risky 20 health!

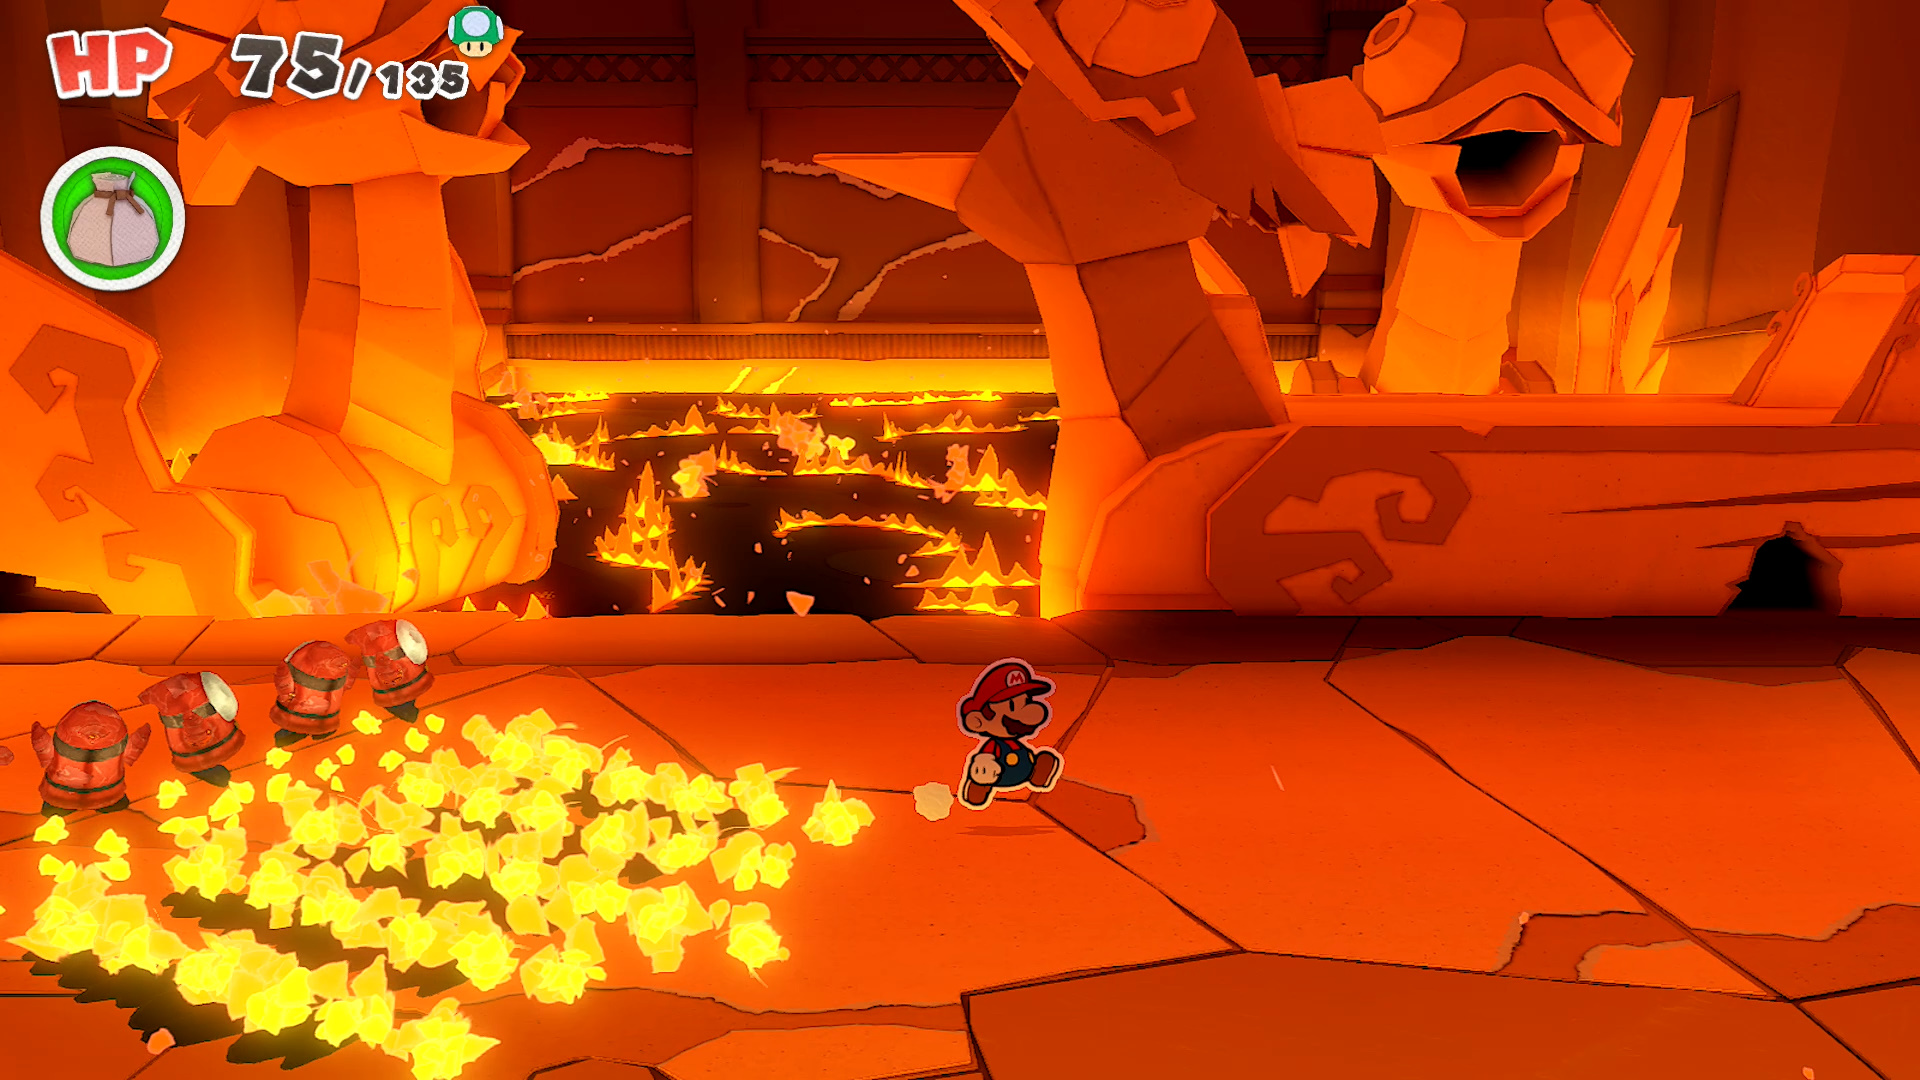
Step on the long platform in the next room and try to memorize the light pattern that appears on the rest of the platforms. If you need a reference, check out the image above. Once on the other side, fill in the hole and save at the Save Block before heading into the next room.


In the next room, fight off the Paratroopa and fill in the two holes in the wall. Enter the next door and a group of folded Shy Guys will go ballistic with flaming buckets will scatter about the room. You need to take them all out and you can do this in two ways. If they trip near you, they’ll spill out a line of fire but give you a chance to whack them. If you whack them while they’re still holding a bucket, they’ll become engulfed in flames and run in your direction. Once they are all gone, the door will open. Don’t worry, there will be plenty of hearts!


The next room is empty so head through yet another door. The next area is a series of paths with fire breathing statues moving about. Run and jump over the first one, then watch as the second one sneezes instead of blowing fire. There’s a hole at the end of the path. Wait for the fire to stop coming from the south, then dart down the path and make a sharp right.


Continue on the path and take note of the Coin Bag in the air. See the little dark spot on the path? Whack your hammer to the left of it to reveal four hidden blocks that’ll help you reach the Coin Bag. Drop down to the lower level and heal at the bench.


On the second part of the path, go right and grab the Ice Flower from the block. Now go all the way south to find a similar situation with the floating block. Eight hidden blocks can be hit underneath it. The one in the air has Flashy Iron Boots inside.


From there, throw confetti onto the hole on the separate path, then jump over the gap to reach the block holding a Shiny Mushroom. Hop over the fire as you continue on to the right, then patch up the two holes at the end near the door.

In the next small room, save at the Save Block, patch up the hole on the wall, and grab the Mushroom from inside the vase. The next room is a repeat of the Shy Guy holding buckets of fire, but there are more this time. When only five remain, they’ll group up to form a line. Have them trip in front of themselves and they’ll run into their own fire. With that all taken care of, head into the next room.


Pass through the small room and enter the next large section. First things first, hop over to the block to get a 100-Coin. This will probably alert the Paratroopa so get ready for a fight. Remember, you can’t attack them with hammers while they are flying so try to line them up in rows. Patch up the two remaining holes on the path and continue on.


While fixing up the second hole, move around while doing so to avoid the Fire Bro on the right. Pass the treasure chest up on the ledge and turn left at the next junction to get over there. You’ll have to fight the Fire Bro so be ready!

The narrow path up ahead requires you to push forward without stopping or turning back. As you run from the falling statues, keep an eye on the path in front of you as some of the blocks will drop into the lava.


Enter the next room and save. Walk down the path and enter the Fire Vellumenatal’s arena! Normal jump attacks will burn right through your boots, so you’ll want to use Iron Boots to actually make progress. Hammers are no good for flying enemies. That said, when you attack like this, molten feathers will drop onto the arena. Touching these will hurt you but you can also move them out of the way by twisting and sliding the rings.


The move you really want to activate is the Water Vellumental’s attack, but the magic circle you need is missing. Aim Mario towards one of the chests to add additional panels onto the arena, including the magic circle you need. For the next turn, run over the On panel before hitting up the Water Vellumental magic circle.


This massive water attack will do a number on the Fire Vellumental and the molten feathers on the arena will be extinguished but not removed. While the fire beast is stuck on the ground, your jump and hammer attacks work but they are also weak. Using the 1000-Fold Arms will let you attack multiple times but it too is weak. Take note, the boss will be stuck on the ground for two turns.


Once the Fire Vellumental gets back up, it’ll bring back all its molten feathers, heal up, and release a powerful Flamethrower attack that’s more deadly the closer you are to the center of the arena. The idea here is that you need the Fire Vellumental to lose as many feathers onto the arena as possible so that its HP is low. Then use the Water Vellumnetal attack to extinguish it and finally the 1000-Fold Arms to finish it off before it can get its feathers back. So once the fire bird is down on the ground, use the first turn to get a few more jump attacks in, then use the second turn when its health is fairly low to finish it off with the 1000-Fold Arms.


Defeat the Fire Vellumental and pick up the Fire Bibliofold to give Olivia a brand new power. Hop onto the gondola and ride back to the entrance where Professor Toad awaits.


With the Fire Vellumental defeated, head back to the Scorching Sandpaper Desert. Time to activate the four towers. Enter the first tower in the main area of the desert. After reading the mural upstairs, go back outside and have Professor Toad dig in front of the front facing left wall of the tower to find a Diamond Jewel. Go back inside the tower and place the jewel in the eye to force it to turn and shine a light on the pedestal in the Scorching Sandpaper Minor.

Your goal now is to activate the three remaining towers to be able to do the ritual in Scorching Sandpaper Minor. This means you’ll have to visit Scorching Sandpaper West, the Scorching Sandpaper Far West, and the Scorching Sandpaper Far East.
Use the links below to jump to different sections of our guide.
| Paper Mario: The Origami King (Guide Hub) |
|||
| Walkthrough | |||
| Toad Locations | Not Bottomless Holes | ||
| Treasures & Trophies | Question Blocks | ||
| Accessories List | Heart Locations | ||
| Boss Guide | Unlockables & Secrets |
||