All Bowser’s Kingdom Power Moons in Super Mario Odyssey listed with locations and images. Our walkthrough and guide show how to find every Power Moon!
| Main Walkthrough | |||
| Cap | Cascade | Sand | Lake |
| Wooded | Cloud | Lost | Metro |
| Snow | Seaside | Luncheon | Ruined |
| Bowser’s | Moon | Mushroom | Dark / er |
| Capture List | Souvenir List | ||
Bowser’s Kingdom has a total of 62 Power Moons. This page lists Power Moons 1-20.
ADVERTISEMENT
| Power Moons | 1-20 | 21-40 | 41-45 |
| 46-62 |
1. Infiltrate Bowser’s Castle!

Getting all the main missions done in Bowser’s Kingdom has you running from the start to the top of the castle. The first one is easy and straightforward. From the Odyssey, run through the gate and use the Spark Pylon to reach the Third Courtyard (Front) Checkpoint.

Capture a Pokio to allow yourself to cling to any white wall. Pull back to fling yourself, hit Y to release. Use the next Spark Pylon to get to the Third Courtyard (Rear) Checkpoint. Defeat the Stairface Ogre by waiting for it to slam its weapon down, then jumping on top of its head and smashing the button. If you’re Pokio, do the same but poke the glowing yellow spot on its forehead. Kill it for the Power Moon!
2. Smart Bombing

Use the Spark Pylon to reach the Second Courtyard. Your job is to collect five moon shards. As Pokio, hitting one of the bombs with your nose will send it flying in the direction you’re facing. Do this to destroy the Bowser blocks! You can find the shards in these locations:
- Underneath the first bomb launcher.
- To the right of the first bomb launcher. Go down the steps and find it over a torch.
- Along the way to the second area. Use Pokio to grab it along the white wall.
- Inside a block in the middle of the two bomb launchers.
- To the right of the light beacon is a path behind the wall.
3. Big Broodal Battle

After collecting the moon shards, pass the gate and take the Spark Pylon over to the Souvenir Shop. To get to the current Power Moon, head over to the next Spark Pylon that will take you to the Main Courtyard Entrance.

Pass the Checkpoint and hop onto either of the two giant circles. On the right circle you’ll fight Topper while the left circle will have you face Hariet. Both fights are generally the same as before but they have gotten a bit more difficult as the bosses are a bit faster and deploy more attacks. Topper will have even more spiked hats and this will make you really want to avoid his spin attack where the affected ground glows purple. Hariet’s battle will have more magma spots left over.

Finish them both off for the Power Moon!
4. Showdown at Bowser’s Castle

Time to get to the top of the castle! Get past the bombs and get to the Outer Wall Checkpoint. Take out the Orge by stabbing it with your nose in the yellow spot on its forehead. Start climbing up the big wall with a Pokio. Shake the controller for a stronger flick! Use the spinning wheels to help you up to the top.

You made it to the Inner Wall! Time to do it again. Use Pokio to get up the moving walls as you try to avoid getting slammed into the spikes. Don’t be afraid to do your flicks quickly, this will get you up safely. Reach the top to get to the Beneath the Keep Checkpoint. Use the Spark Pylon to get to Bowser of the final rooftop!

Of course, things are never that easy. Approach Bowser and Peach to see a cutscene where Bowser makes off with the princess while you’re left behind to fight RoboBrood, a robot controlled by all four Broodals.
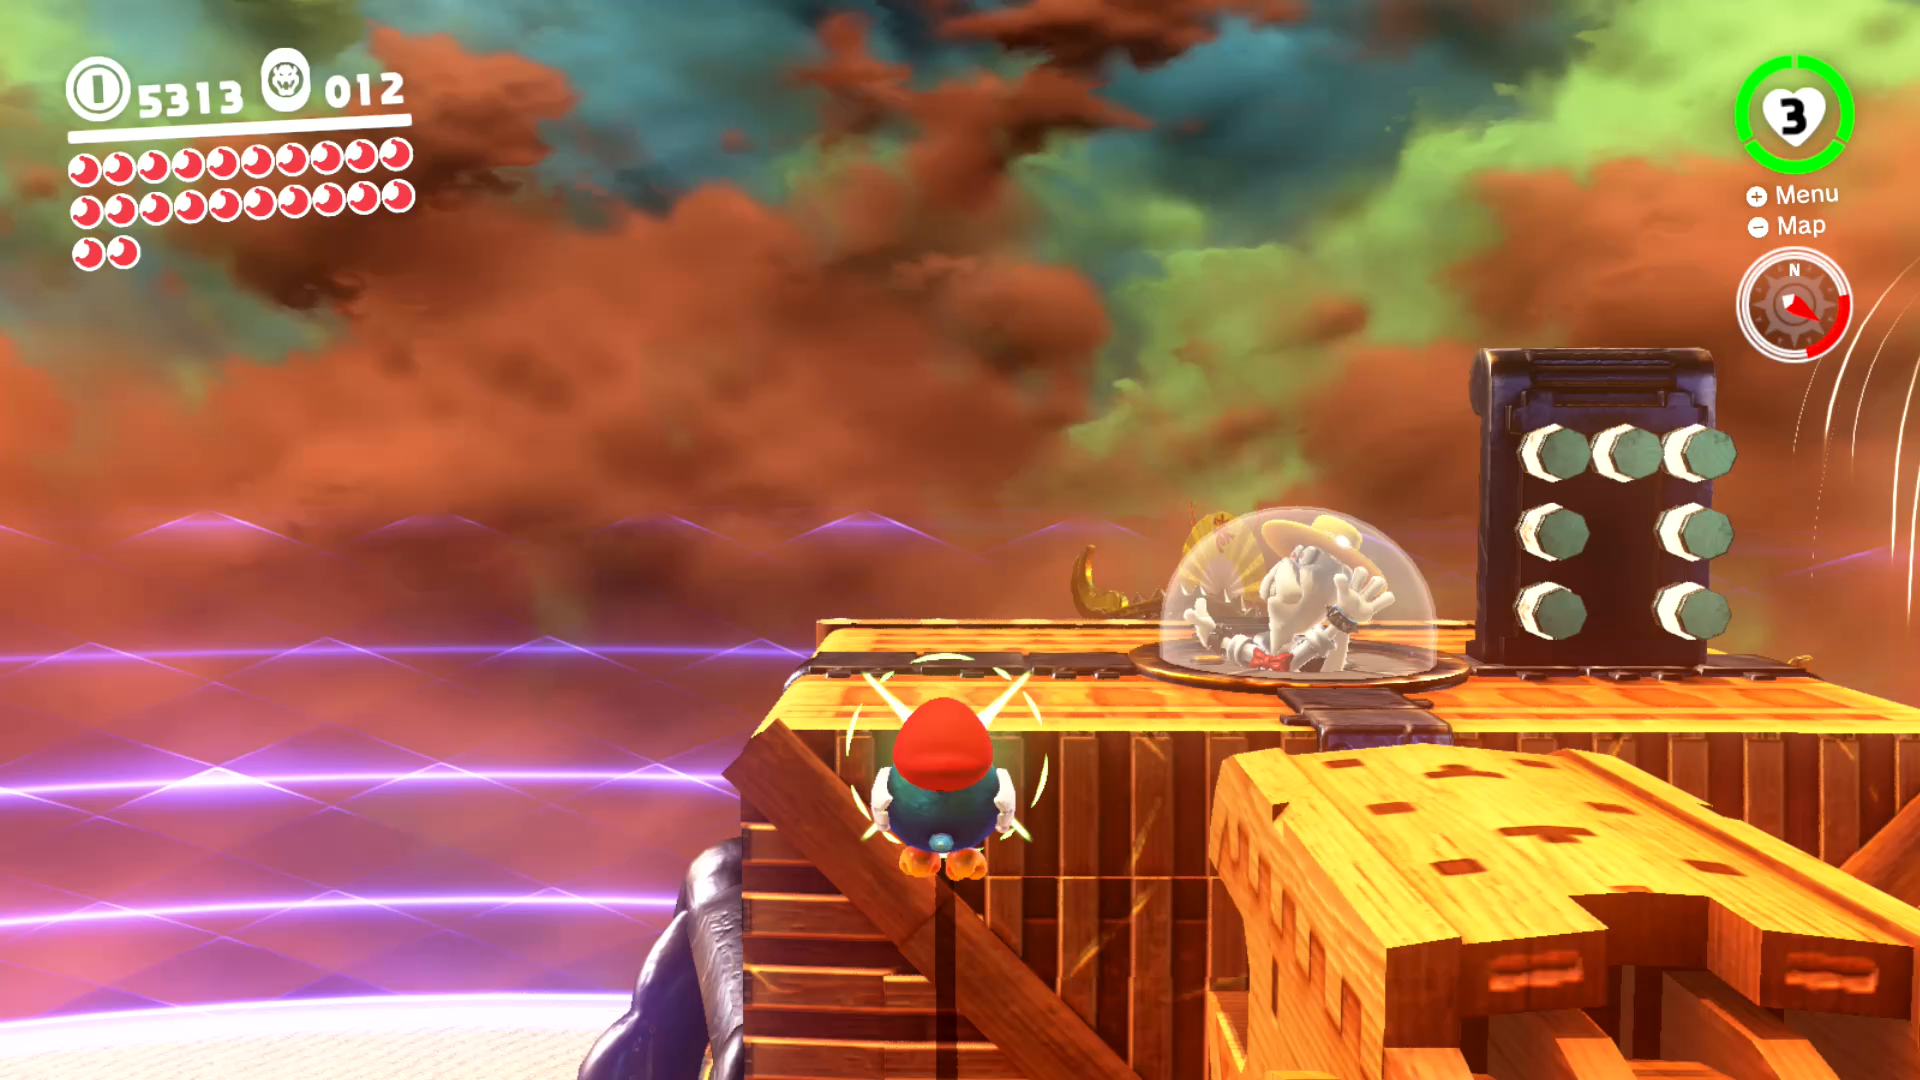
There are four parts of this fight, each one ending with you slamming the pod of one of the Broodals. When the battle starts, bombs will drop from the machine. Capture a Pokio that eventually drops out as well. Hit the bombs back towards the legs of RoboBrood. Two hits will take out a leg, causing it to fall. Use Pokio to get to the top where you’ll ground the Broodal.

Repeat this three more times to defeat the thing. As the fight goes on, things get a little more difficult. Spinning ropes will get thrown out that can be easily taken out with Cappy. The RoboBrood will also charge at you and try to stop you with its feet. Finish the robot off to get your Multi Moon!
5. Behind the Big Wall

Reach the Third Courtyard (Front) Checkpoint and use a Pokio to reach the top of the big wall. Drop down on the other side to find the easy Power Moon.
6. Treasure Inside the Turret

At the Second Courtyard, go to the area where the the two bomb launchers are at and look for a white wall on the left that extends down beyond the floor. Use Pokio to poke your way down, following the wall around the corner where the Power Moon is hiding.
7. From the Side Above the Castle Gate

After you get Power Moon 2 in the Second Courtyard, pass through the gate but don’t use the Spark Pylon just yet. Instead, triple jump onto the wall, wall jump, then dive to the area on the left. The Power Moon is on the roof!
8. Sunken Treasure in the Moat

After passing the gate at the Main Courtyard Entrance, look for the binoculars near some water. Jump into the small pool of water and swim to the bottom to find a Power Moon.
9. Past the Moving Wall

On the left side of the main castle are walls of moving white walls near the very bottom. Capture a Pokio and cling to the moving walls, jumping before you hit any of the spikes. Get inside the caged area to find the Power Moon you seek.
10. Above the Poison Swamp

Available after completing all the main missions in Bowser’s Kingdom. Go to the Beneath the Keep Checkpoint and look for a Lakitu on the right side. Capture it and hover over the poison over to the top left corner of the area. Get off there and use the slingshot to reach the the small roof. Jump off to the next corner of the swamp to get to an easy Power Moon.
11. Knocking Down the Nice Frame

Available after completing all the main missions in Bowser’s Kingdom. Go to the Beneath the Keep Checkpoint and look for a Lakitu on the right side. Capture it and hover over the poison over to the top left corner of the area. Get off there and use the slingshot to reach the the small roof. Hit the frame at the front with Cappy to drop it into the poison to have a Power Moon appear.
12. Caught on the Iron Fence

Around the Odysssey is a fence with little Bowser heads on each pole. Behind the Odyssey is a Bowser head that faces outward. Throw Cappy on and have him spin around the head to make the Power Moon appear!
13. On the Giant Bowser Statue’s Nose

Available after completing all the main missions in Bowser’s Kingdom. Return to the top of the castle where you almost fought Bowser and drop off the front edge of the roof. Drop onto the giant golden Bowser head and find a glowing spot on the nose. Ground pound for a Power Moon.
14. Inside a Block in the Castle

Get to the Outer Wall Checkpoint and go to the nearby Ogre. Stand new the three Bowser Blocks and let the Ogre smash the glowing one to reveal a Power Moon.
15. Caught Hopping at Bowser’s Castle!

Available after completing all the main missions in Bowser’s Kingdom. Return to the very top of Bowser’s Castle where you almost fought Bowser to find two rabbits. One of them holds a measly coin while the other contains a glorious Power Moon. Catch it to get your prize!
16. Exterminate the Ogres!
Reach the Main Courtyard Entrance and make your way on top of the building on the right. An easy way to get up there is by going up to the area where you fought the Broodals and jumping from there.

After taking the Spark Pylon you found on the roof over to the small island, start taking out the Orges. After they smash down the giant block, jump on top and smash their heads to take them out. Take out all three to get the Power Moon! Nothing of importance in the blocks, so don’t bother!
17. Bowser’s Kingdom Timer Challenge 1

Available after completing all the main missions in Bowser’s Kingdom. Return to the arena where you fought the RoboBrood. Now you’ll find a scarecrow for a timer challenge. Throw Cappy on and get to the top of the spinning blocks to find the Power Moon. Simple jumps will get you from platform to platform but make sure you are always watching the next step.
18. Taking Notes: Between Spinies

At the Third Courtyard (Rear) Checkpoint, look for a note to the left of the two Spinies. Grab it and then collect all the notes in the small area while avoiding the Spinies. It’s even easier with Pokio. Just use him to take out the enemies and you’ll collect the notes with ease.
19. Stack Up Above the Wall

In the first courtyard where the Odyssey is at, capture a Goomba and create a Goomba Tower will all the Goombas in the area. Walk around the corner and step on Goomba switch to have the Power Moon appear.
20. Hidden Corridor Under the Floor

From the Main Courtyard Entrance, get to the moat and capture Pokio. Get across the water and start going up the wall. Instead of reaching the top, wrap around the corner to find a few crates in the wall. Get above them, release from the wall, smash through the crates, and save yourself on the white wall below. Power Moon is inside.
| Power Moons | 1-20 | 21-40 | 41-45 |
| 46-62 |
| Main Walkthrough | |||
| Cap | Cascade | Sand | Lake |
| Wooded | Cloud | Lost | Metro |
| Snow | Seaside | Luncheon | Ruined |
| Bowser’s | Moon | Mushroom | Dark / er |
| Capture List | Souvenir List | ||