Scorching Sandpaper Desert is the fourth Yellow Streamer level in our Paper Mario: The Origami King Walkthrough. Our guide also includes collectibles.
ADVERTISEMENT
Just looking for collectibles? Check out our Scorching Sandpaper Desert collectibles page for simple lists and locations for every collectible:
| Scorching Sandpaper Desert Collectibles Guide | |||
| Toads | Holes | Treasures | Blocks |
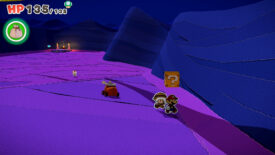
With the Boot Car at your side and the Breezy Tunnel complete, you’ve finally made it to Scorching Sandpaper Desert. Drive up the hill to get a look at the vast and expensive purple desert. Looks like there is a hole where the sun should be!
Not only are there a ton of collectibles to pick up in this area but you also have access to FOUR additional areas with their own set of collectibles. Because this area is so open and the fact that you return multiple times, this guide is split into different section, including one for grabbing any collectibles. This is what you get for wanting more open world segments!
- After visiting Shroom City
- After reading the murals
- After completing the Fire Vellumental Cave
- Collectibles
To start, follow the massive yellow streamer in through the desert and past the tower. Enter the Scorching Desert Minor and drive up to the pedestal where the streamer ends. Hmmm, the inscription on the base features symbols you’re unfamiliar with. To get some help, travel over to the right exit to enter Shroom City.
After Visiting Shroom City
You’ve gathered information from Shroom City and now you’re looking for a professor at a place called the Sun Altar. Return to the desert and look for the Sun Altar in the north most section. There’s also a yellow warp near the Sun Altar location that can transport you back to the Toad Town museum.
If you want, use this time to return to Toad Town to collect the treasure from the two story house now that you rescued that Toad in Shroom City. You can also stop by the Sensor Lab to pick up the Lamination Suit.
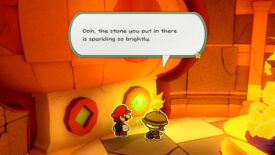
Drive up to the Sun Altar and walk up to the pot in the center. Place your Sun Incense in and a giant sandstorm will appear. No wait, it’s a GIANT POKEY. Yes, this is a boss fight, but not a battle! The Paper Macho Pokey is fast so you’ll want to hop into your Boot Car to zip around.
Avoid the attacks and wait for it to try and slam into you with its entire body. When it does, go to the last segment and whack any part of the segment, it doesn’t have to be a weak spot.
The next phase is similar but this time there will be a couple of sand tornadoes thrown into the mix. Once the Pokey slams down, it’ll try to continue rolling before it smacks your Boot Car right out of the sandstorm. Quickly use your Boot Whistle to summon it back, then use it to escape the Pokey’s quick movements. As you wait for it to stop rolling, stay by the end of the Pokey as it can’t turn that quickly at the end point.
Now Pokey will pull out a new move that sucks everything around towards it. Just use the boost on your car to get away! The final phase is just the Pokey’s head that will roll around. It rolls quickly but it’s slow to turn. Then it’ll start bouncing. The last bounce is a big one but it’ll also stun the poor guy. As it sinks into the sand, run on top of its head and hit that final weak spot.
Once defeated, meet Professor Toad and yes, he’s joining your team! After he gives you a rundown of the Ancient Ones, specifically the apparently still alive Khap’taan Teeowed, hop into your Boot Car to head to the hotel to read the writings there. As you leave, Professor Toad will spot a golden circle and teach you how to use him to dig up these shining spots. If you’re not going to stick around to collect everything in this area, head back to Shroom City!
After Reading the Murals
Now that you’ve read the murals on the second floor of the hotel and the suite room, head back to the Scorching Sandpaper Desert. Head to the center of the desert, actually a little closer to the right side, and look for a ring of six bird statues. Hop off your Boot Car, and use your hammer to smack each statue and turn its direction. Have all six birds face the center of the ring to have a stand and microphone pop out of the ground.
Olivia will step up to the plate and you’ll get to pick one of the songs you’ve heard along your journey so far. Happy & Sappy is from Ol’ Grandsappy, Go with the Flow is from the boat tour ride, and My Heart’s a-Burnin’ is the one from the ritual. Pick the third one for uh, quite the performance!
After the song comes to an end, a cave entrance will appear behind you. Head into the cave to enter the Fire Vellumental Cave.
After Completing the Fire Vellumental Cave
With the Fire Vellumental defeated, head back to the Scorching Sandpaper Desert. Time to activate the four towers. Enter the first tower in the main area of the desert. After reading the mural upstairs, go back outside and have Professor Toad dig in front of the front facing left wall of the tower to find a Diamond Jewel. Go back inside the tower and place the jewel in the eye to force it to turn and shine a light on the pedestal in the Scorching Sandpaper Minor.
Your goal now is to activate the three remaining towers to be able to do the ritual in Scorching Sandpaper Minor. This means you’ll have to visit Scorching Sandpaper West, the Scorching Sandpaper Far West, and the Scorching Sandpaper Far East.
Collectibles
For the collectibles in this area, I suggest you wait until you’re able to make use of the glowing spots scattered about the desert. No need to make two trips, just wait until you find Professor Toad and gain the ability to dig these spots up!
Starting from the Sun Altar, head south and yank the Toad out of the sand. Go a little more south and along the right wall and you’ll find a block with a 100-Coin inside.
Before you enter the area in the bottom right, scoop out the shining light to find a Gold Hammer. Now in the ruins area, patch up the hole on the wall to the north, then grab the block holding Flashy Boots.
There are two more holes to patch up near the folded Dry Bones. Enter the area by breaking down the cracked wall, then find a collectible treasure from the northern shining light. In the room with the leftover door, whack the scorpion Toad and hit the block to find a Shiny Fire Flower.
Go further into the ruins to find a hole blocking the path. Walk through the tunnel to find a secret area. The block has an Ice Flower inside. Up ahead is a box that’s shaking. It’s a folded Boo so only crack open if you want to fight! Otherwise rescue the Toad from the cactus by knocking it loose.
See the door shaped hole in the back? Fill it in to find another secret cafe! Buy the coffee for 100 coins to fully heal, plus you get to watch a few new characters sip away at their drink.
Return back to the open world of the desert. Ride west along the southern wall and you’ll eventually run into another Toad stuck in the sand. Keep going along the southern wall, passing the entrance and reaching the southwestern section. See that ring of rocks? Dig in the center of the rocks to find a Shriveled MAX UP Heart. Take it to the lake in Whispering Woods to rejuvenate it!
In the same area, fill in the giant hole so you can reach the block with a Flashy Hammer. Start riding along the western wall. First there’s a hole. Then there’s another hole but there’s also a lizard Toad. Walk up the hill and drop onto the lizard to knock it off the wall.
There’s another hole above that, when filled in, leads to the third Sensor Lab satellite office. Yank the Green Toad out of the fax travel machine and head back outside.
Before you head towards the tower, let’s take a look at some of the things to collect in the center of the desert. One of the shining holes has Gold Boots. The shining spot near the nearly sunken Toad has a collectible treasure. And yes, please grab that Toad too.
Patch up the hole to the left of the yellow warp pipe, then head towards the tower. Whack the bug Toad on the left side of the tower, then head inside and patch up the hole on the tablet. There’s also a hole to the left of the tower that needs filling!
Use the links below to jump to different sections of our guide.
| Paper Mario: The Origami King (Guide Hub) |
|||
| Walkthrough | |||
| Toad Locations | Not Bottomless Holes | ||
| Treasures & Trophies | Question Blocks | ||
| Accessories List | Heart Locations | ||
| Boss Guide | Unlockables & Secrets |
||

