This Chapter 6 guide in our Paper Mario 64 walkthrough takes you through Flower Fields as Huff N. Puff wreaks havoc from above.
Like every guide in our walkthrough, our Paper Mario Flower Fields walkthrough keeps it to the point and gets you moving to your next goal without getting too stuck in the details. We’ll also mention any Star Pieces or badges you can snag along the way.
ADVERTISEMENT
You can jump to a specific part of our Paper Mario 64 Chapter 6 walkthrough by hitting these links:
Flower Fields
Not sure how to get to Flower Fields? We have all the details in our Chapter 5 guide but the quick explanation is that you need to get retrieve four Magical Seeds and give them to the Toad in the garden across from the post office in Toad Town. Seeds are located in Mt. Rugged, Forever Forest, Jade Jungle, and Toad Town.


Ultimate goal? Get the three items needed to create a beanstalk that will take you to the clouds above. You’re going to be doing a decent amount of zigging and zagging across the different areas of Flower Fields so let’s give a basic rundown before getting into the specifics:
- Get the Magical Bean
- Give Red Berry to Red Flower
- Get Fertile Soil
- Give Yellow Berry to Yellow Flower
- Give Blue Berry to Blue Flower
- Get the Crystal Berry
- Get the Water Stone
- Give the Bubble Berry to the Bubble Plant
- Find Lakilester
- Destroy Huff N. Puff’s machine
- Plant the three items
- Climb the beanstalk up to Huff N. Puff
Since you’ll be going back and forth through several areas, we either recommend fighting the enemies as soon as you see them to clear the path or make good use of your spin to get past once they spot you. Remember, you can always leave Flower Fields from the center and get immediately back to Toad Town where the free inn is at.
Magical Bean and Fertile Soil


Listen to the Wise Wisterwood speak for a moment. Be aware, there are six paths branching out from the center of Flower Fields. Three on the left and three on the right. To start, go down the middle right path. Pass by the enemies and continue into the next room. Here you’ll meet Petunia. Speak with her, then defeat all four Monty Moles in the area.


Fight them off and Petunia will reward you with a Magical Bean. Before you run off, whack the floor to the left of Petunia for a Star Piece. More importantly, smack the tree in the back to get a Red Berry. Do NOT leave without getting the berry!

On your way back, take note of the three pink trees. Using you hammer, first smack the tree in the middle, then the tree on the right, and finally the tree on the left. This will drop a Happy Flower badge.


Return to the center. Now take the bottom left path. Give the Red Berry to the Red Flower and your happy new friend will open up the gate. Continue to the left. Once you see the tree, smack it to get a Yellow Berry. You can also smack the ground in front of the tree for a Star Piece!

Enter the next area and speak to Posie under the crystal tree. Now you have Fertile Soil. You would think getting just one more ingredient would be simple after this.
Getting the Water Stone


Back in the center of Flower Fields, take the bottom right path. Give the Yellow Berry to the Yellow Flower to open up the next gate. Jump over the gaps to get over the thorny vines and make sure to use Parakarry for the longer stretches.

Two collectibles in this room. After the thorny vines, go up the steps and get past the five Amazy Dayzees to reach a Super Block. Fight them all off or enter battle and use your temporary invincibility to get past them. Near right side of the room, look for a Star Piece hiding in plain site among the flowers.


Before you enter the next area, smack the tree to get a Blue Berry. Make sure to grab both, you’ll need them! In the next room, walk across the empty pond and go up the steps. Near the white fence is a hidden panel in the ground hiding a Star Piece.


Go into the third room and speak with Lily. Looks like she needs a Water Stone. Oh boy. Return all the way back to the center room. Let’s make a quick detour off the main mission. Return to Petunia by taking the middle right path and past her into the third room. Here you’ll find a well. Throw your Blue Berry down the well to get the Flower Saver badge. This is a great one!


Head back to the center room and go down the middle left path. Good thing you got that second Blue Berry, right? Give it to the Blue Flower and he’ll open up the gate for you. Make your way past the enemies and the spring pad and enter the next room. A Lakitu ambush! Get through the mandatory fight to continue on.

Oh what a joy, another maze. Your goal is to get to the center pipe. From the start, go up and push through the tall hedge. Go past the first and second pipe and keep following the path. Go south past the next two pipes, then take a right and keep moving past the bottom pipe. Now go up a bit and you’ll have reached the center. Use that pipe to reach the other exit. It’s like a big spiral.


Speak with Rosie who agrees to give the Water Stone in exchange for something more beautiful. Are we serious? This next part is quite simple, you just have to do some backtracking. You need to return to Posie at the crystal tree. Leave this area and return to the center room. Go down the lower left path and go all the way to the end. Speak to Posie and she’ll give you a Crystal Berry. Now go all the way back where you just at to Rosie. Yes, you have to do the maze again. Speak with Rosie to get the Water Stone.


You thought the backtracking was over? Return to the center and go down the lower right path once again. Go all the way back to Lily and give her the Water Stone. This will return water to the pond. And you’ll get some Miracle Water! At the pond in the previous room, use Sushie to reach the Bubble Tree in the middle. Whack it to get the Bubble Berry.
ADVERTISEMENT
Finding Lakilester


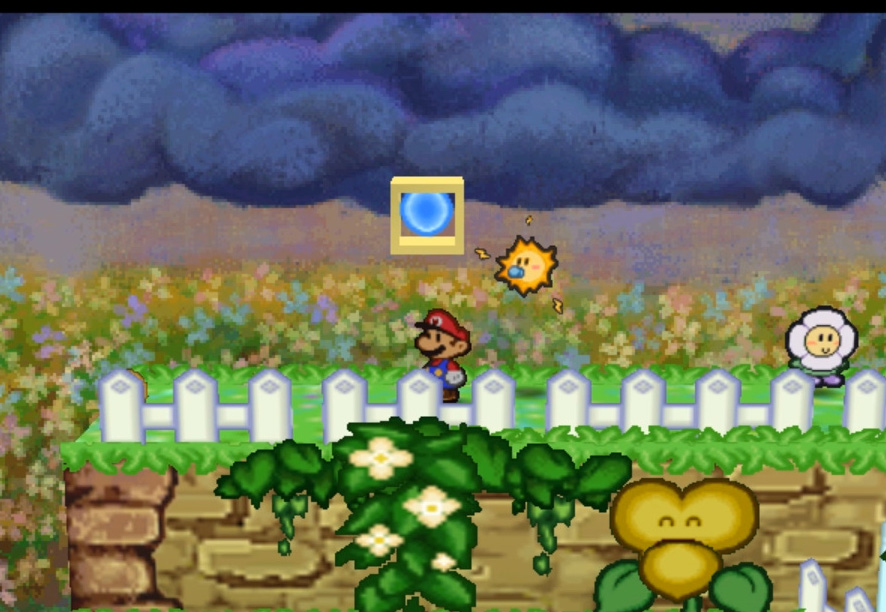
Okay, head back to the center room. Go up the upper left path. Speak with the blue Bubble Plant and give it the Bubble Berry. The cool blue fellow will create a bubble you can use to cross over the patch of thorny vines. Once you make it across, go up the steps and cross the wooden log to get a Star Piece.


Enter the next area and climb up the steps. Bomb the rock with Bombette and fall in the hole to reach the Mega Smash badge. Continue on to the left. Walk around the base of the tower and bomb the rock in the small doorway. This will cause the tower steps to form.


Reach the top and talk to the Sun. With that cleared, return to the previous room and you’ll run into Lakilester. He has 50HP. He’s a flying enemy so have a partner out that can reach him. Defeat him and he’ll join your team as your final partner! His ability allows you to move a bit quicker and you can also hover over spikes and those nasty vines from earlier.


Return to the center. Now go up the final path, the one to the upper right. Another puzzle. There are seven exclamation panels with varying heights. Ground pounding one of these panels will make all panels of the same color move up or down. It’s a bit hard to describe the solution in text so let’s number each panel starting from the left to the right. That means the first red panel you see is 1 and the first green panel you see is 2. As you do this puzzle, remember you can use Lakilester to move across the thorny vines.
Panel puzzle order: 1, 6, 5, 2, 6, 7


Now that you’ve made it up to the ledge, walk around the gated wall and use the spring pad to reach the Super Block. In the same area, stand over the third arch and Spin Jump to reveal a Star Piece.


The next room is a series of logs and thorny vines. Remember, you can hover over all of them! There’s also a Letter hidden among the red flowers after the first log. Reach the last room and fight off the enemies surrounding Huff N. Puff’s Huff Huff Machine. What a name. Once the enemies are gone, start whacking the machine from both sides to tear it to pieces.


With the sunlight back, return to the center room and place the Fertile Soil, Magic Bean, and Magical Water in the soft patch of dirt in front of the massive talking tree. This will grow a beanstalk you can use to reach the clouds. Once up in the sky, use the cloud in the back to get high enough reach the S. Jump Chg. badge. Take the exit on the right to reach the boss! Make sure you returned to Toad Town to heal up and all the jazz.
Boss: Huff N. Puff


Time to fight the big fluff. Huff N. Puff has 60HP and has an annoying trait. Every time you attack, a smaller cloud called a Tuff Puff spawns. That means if you do an attack that hits multiple times in a row like Bow’s Smack attack, an equal amount of Tuff Puffs will spawn. That’s bad! Not only will these turbulent lumps deal 2 damage each, but they’ll also get sucked back into Huff N. Puff as a healing item. Yikes. One way to minimize the damage is to use the Star Spirit’s Chill Out power to reduce their attack. You can also use Lakilester’s Spiny Surge to get rid of them all. Because of the self-healing, you’ll want Mario to use powerful one-hit attacks!
Peach’s Castle (Intermission)


Remember the Sneaky Parasol Peach got by winning the quiz last time? Time to put it to use. Go through the same fireplace secret passage that Bowser or anyone has yet to discover. Somehow. Once in the main lobby, use the parasol near an enemy to cope their exact look. This will allow you to freely roam the castle. Start by going up the steps and speak to the guard. He’ll let you through. Go up the long steps and talk to the next guard holding down a door. He’ll give you a Castle Key.


Go the opposite direction and go all the way south until you reach the locked door. This will take you to the dilapidated outdoor area of Peach’s Castle. Use your parasol ability on the Spike, then return to the guard that gave you the key. He’ll let you through. Keep following the path until your reach the roof. Cutscene time! And capture time!
ADVERTISEMENT
Toad Town Once Again


Getting back to Toad Town is a breeze, and not the Huff N. Puff kind of breeze! There’s really not that much to do besides head for Chapter 7. Start by speaking to the Ninji inside Merlon’s house, then head for the Toad Town Tunnels. Go down the hole, cross the water with Sushie, then cross the spikes with Lakilester. Down the warp pipe you go!


Walk along the narrow paths and reach the stone block on the right. Break through to enter the next room. Break the metal block to get into the room after that. Break the brick block to bring the spring pad down, then use it to reach the chest holding the Ultra Boots.


Now you can do an extra jump mid-air that lets you hit higher objects. Return to the room where you crossed the spikes and enter the area on the right. There’s a series of hidden blocks lined up after the visible block. Use your new jump to reach them and form a path. Open the blue doors and head down the pipe. In the icy area, go left to find a Super Block at the end.
Hop down into the warp on the right to get to Chapter 7!
Got any tips or suggestions for our Paper Mario Flower Fields walkthrough? Let us know in the comments!
Use the links below to jump to different sections of our guide.
| Paper Mario 64 Walkthrough (Guide Hub) |
|||
| Ch.1 | Ch.2 | Ch.3 | Ch.4 |
| Ch.5 | Ch.6 | Ch.7 | Ch.8 |
| Star Pieces | Super Blocks | ||
| Badges | Items | ||
| Partners | Chuck Quizmo | ||
| Cooking | Letters | ||
| Koopa Koot |
Secrets |
||